Create a Sample Ballot File for a Commercial Printer
Before creating the sample ballot file, review Things to Do Before Creating the Sample Ballot File for a Commercial Printer.
- Go to REPORTING > Flexible Reports.
- In the Data Source box, select Sample Ballot Run, and then the election.
- In the Output Option box, select Text File Export for Commercial Printer.
- In the Address Selection box, select Unprotect Addresses.
- In the Record Selection box, click Status, Birthdate, Registration Date.
- On the Select Voters dialog, select Active Voters or All Eligible Voters. The option Active Voters excludes voters whose voter registration status is Inactive, even though they are eligible to vote in the election. The All Eligible Voters option includes Active and Inactive voters.
- Determine if you want to include military and overseas voters. If you do, select the two Both options. Keep in mind that voters who have been sent an absentee ballot or who have sent in a Federal Write-In Absentee Ballot (FWAB)
will not be included in the export file.
- An entry in the Country field, regardless of whether the entry is USA or another country.
- The text APO, DPO, or FPO in the City field.
- If you are creating the file after book closing (which is typically the case with sample ballots), in the Date Range Testing box, select Registration Date and enter the book closing date in the field on or before.
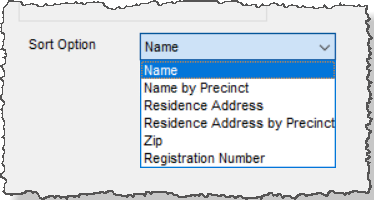
- Select your sorting preference from the Sort Option menu.
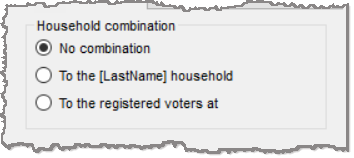
- To send only one ballot to each household, regardless of the number of voters living there, choose Residence Address, Residence Address by Precinct, or Zip to display the Household combination box. Then, indicate how the household ballots should be addressed, either To the [LastName] household or To the registered voters at. See Household combination for information about these two options.
- To send a sample ballot to each eligible voter (excluding absentees and early voters), select any of the sort options. If the Household combination box appears, select No combination.
- Click Run Flex Rep. After processing, the Text Export Options dialog displays options that specify how and where the export file should be saved.
- Do any of the following, and then click OK:
- Rename the default file name—the numbers in the file name represent the date and time when the file was created. You might consider renaming the file so that the printer can more easily identify it—something like SunnyCountySampleBallot.txt, for example.
- If you are FTPing the file to a printer—choose Hard Disk and Zip Output File.
- If you are sending a CD to the printer and you have Easy CD Creator software— select “Direct CD”. At the end of the run, Voter Focus will display the location of the export file, and you can then drag the file to the CD.
- Open the export file. You can use Notepad, Microsoft Excel (counties with fewer than 64,000 voters), or Microsoft Access (larger counties) to view the file.
- Examine the file for irregularities and spot-check a few voters to make sure the information in the file is correct. If there are problems, fix them and rerun the sample ballot export until you get a clean file.
Click Close to return to the FlexRep menu.

The default settings on the dialog, including the file location, are defined on the FlexRep Options dialog. You can change the settings for this job, if needed.
A report prints to your default printer listing the options you selected for the run, the affected voters (or households), and the number of voter records (or households, if you are doing a household sort) meeting the specified criteria. This number—Total voters listed—is at the bottom of the report and can be given to your commercial printer should they ask how many records to expect.
Voters who have requested delivery of their sample ballot by email are included in the file.


