Last Update: December 10, 2014 |
How to
Changing an election's status to Deleted gives you the option of removing all related files, including the election record itself, from the database. You are not required to remove all files, but you must change the election to Deleted status in order to perform a removal.
Use the Deleted status only for elections that never actually happened. This might be an election that someone in your office created by mistake or an election that was scheduled and later cancelled. If you simply want to prevent a past election from cluttering election lists, set the election's status to Closed rather than Deleted.
If you delete an election but do not remove its record and associated files from the database, you will see the election in lists of elections where Deleted is selected (such as on Select Election dialogs). The election will not appear in these lists if you remove the election record and files.
To delete an election:
Ensure that the election you want to delete is the focused election. If not, click Change Election Status on the Console and select the election.
Go to ELECTIONS > Maintain Election Settings > Election Maintenance.
On the Elections Maintenance dialog, click Change Status/Default. On the Election Status dialog, select Deleted. Click Save and Close.
On the Election Maintenance dialog, click Utilities.
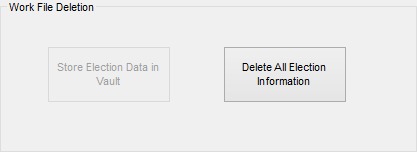
On the Election Maintenance Utilities dialog, notice the Work File Deletion box:

If the election has any of these files on the database:
Precinct register |
EViD transactions |
Mail-ballot files |
Book closing files |
Election worker pay files |
|
and your county uses an election vault, the Store Election Data in Vault button will be enabled and the Delete All Election Information button will be disabled. This means you must move the files to the vault before deleting the election from the database. See How to Store Election Data in the Vault for instructions. Once the files have been stored in the vault, you can return to this procedure and continue with the next step.
Click Delete All Election Information. You will see a message asking you to confirm the deletion. Click Yes to completely remove the election from the database.