Print or Email a Letter to Workers Meeting Search Criteria
This topic explains how to create a letter to a group of workers meeting search criteria defined using the Worker Flexible Search feature.
The letter can be printed out for mailing and it can be emailed to workers with a verified email address. For emailed letters, the text of the Word document is included in the body of the email.
The instructions here assume that the letter has already been set up as a mail merge document using data fields in the Voter Focus mail merge data file MrgVoters.txt. (The procedure described here creates a new merge data file, which uses as its template the fields in MrgVoters.txt.)
You will have the opportunity to edit the mail merge document in Word during the procedure described below.
Keep in mind that search results returned by the Worker Flexible Search program can differ depending on your current work type. Searches examine only those workers whose work type availability matches the current work type.
- Go to ELECTION WORKERS > Worker Flexible Search.
- On the Worker Flexible Search dialog, specify the search criteria for the workers you want to contact. Click Search. Voter Focus finds the workers meeting the search criteria and lists them on the Search Results tab. The merge data file that you create as part of this process (explained below) will contain the information shown here.
- On the Search Results tab, click Export/Merge. You are asked if you want to include class or election assignment information for these workers. Answer Yes or No, according to your needs.
- In response to the question Would you like to use this as a Microsoft Word Merge datasource?, click Yes.
- On the Delivery Selection dialog, indicate how you want the letters delivered—by mail and/or email—and click Continue.
- On the Election Worker Merge Document dialog, navigate to and select the Word file containing your letter and click Open.
- On the Election Worker Export File dialog, save the list on the Search Results tab as the merge data file, which will be applied to the merge document you selected in step 6. You can either create a new merge data file by entering the name in the File name field or you can save the results under an existing file name. (The merge data file is saved in comma separated values (CSV) format, which can be read by Word or Excel.) When you click Save, Voter Focus creates a letter for each worker found by the search.
- During
this process, each worker on the Search
Results tab will be highlighted
as their letter is prepared. When the highlight bar reaches the last
worker and stops, you will see the Windows Print dialog. Select the printer to produce the
letters for workers who are receiving theirs by mail and click OK.
The letter will open in Word, showing data for the first worker in
the search results list. (You might have to minimize other dialogs
to see it.). On top of the Word document, you will also see these
instructions:
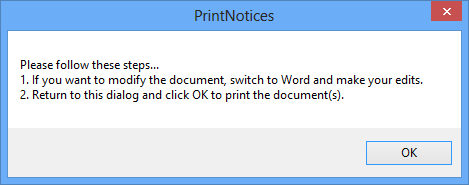
- Switch to Word and check the letter to verify you are merging the data you want and that all data fields are replaced by live data. You can also make text edits to the letter. When you are satisfied the letter is correct, return to the dialog shown above and click OK. The letters for workers receiving letters by mail will print. After the letters print, you will be asked, Do you want to save the document file? If you made changes to the letter and want to save them for subsequent runs, click Yes; to discard your changes and leave the mail merge file as it was, click No.
- If you selected delivery by email in step
5, you will see a message indicating the number of emails successfully
queued for transmission, and the number, if any, that failed to queue.
Click OK to open the Email Status Report showing
the workers whose letter is being sent by email. If any emails failed
to queue, check the Status column in the report to see which
workers were affected. For all email recipients—queued and failed—an
entry is made on the Comms tab in workers' voter registration
records. You can double-click the Comms entry at any time to
open a dialog that lets you resend the email. If the email failed
to queue, the reason is shown in the Send
Error box.
When you are finished with the Email Status Report, print or export the report and then close it.
- In response to the message Update EW Communication Date Last Sent?, click Yes if you want mailing of the letter recorded in each worker’s record. This updates the Date Last Contacted field on the General tab and logs an entry on the Audit tab. If you click No, no record of the mailing is kept.
If you want to print mailing labels for the recipients of the letter, you must create a Word mail merge document formatted for your mailing label sheets. Insert the mail merge fields from the merge data file created above, and then print the labels.


