Last Update: January 29, 2015 |
Dialog Help
To access: PRINTING > Notices Queue > {notice type}
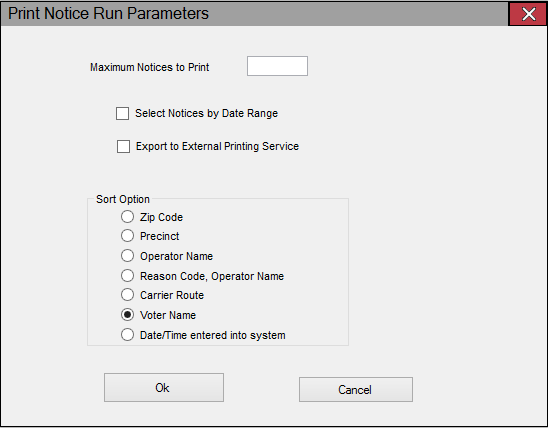
This dialog gives you ways to control the output when running a batch of notices.

Fields and Controls on this Dialog
This option lets you break up large runs by specifying the number of notices to be printed in this run. For example, if your county has 10,000 voter information cards in the Notices Queue and you want to divide the printing into 10 batches, you would enter 1000 in Maximum Notices to Print. At the end of the run, you would click Update to record that the card was sent to those 1,000 voters, which would remove those 1,000 notices from the Notices Queue. To print another batch of 1,000 cards, you would repeat the run and enter 1000 again, until you had printed all 10,000 voter information cards in the Notices Queue. Leave this field blank to print all notices of the selected type. |
|
Select Notices by Date Range |
Select this check box limit the run to notices scheduled during a particular time period. When you click OK, you will see a dialog where you can enter the starting and ending dates and times of the time period. |
Applies only to notices whose Document Type is Form. Select this check box when you want to create an export file containing the notice information rather than printing the notices now. The export file will contain precisely the information that would be printed and it can be delivered to a commercial printer for production of the form. This option is typically used for voter information cards. The export file is created as a comma-delimited text (TXT) file in the folder specified in REPORTING > Flexible Reports > Flexrep Options > Path for Export Work Files. The default file name is: NoticesExportYYYYMMDDHHMMSS.txt where YYYYMMDDHHMMSS is the current date and time. When you click OK, you'll see the Windows Save As dialog where you can change the file name or destination folder if you wish. |
|
The default sort order for notices is Zip Code. If you select a different sort option, that option will be retained for your workstation until you change it again. Zip Code—Zip Code (followed by country name and voter name) Precinct—Precinct (followed by voter name) Operator Name—Operator number Reason Code, Operator Name—Reason code (followed by operator number) Notice Reason—Notice reason Carrier Route—Mail carrier route Voter Name—Voter last name Date/Time Entered into System—Date/timestamp when notice was scheduled Note Reprint runs are made in the same order as the original run. |