Last Update: April 10, 2014 |
About
The Web Monitor program allows technicians at the elections office and
at remote locations to view, in real-time, the status of all EViD stations
deployed at voting places. Web Monitor runs from the EViD tab
in Voter Focus, but it can also be run as a standalone program on a laptop
in the field. All you need on the laptop is the Web Monitor executable,
an internet connection, and a Web Monitor non-admin user name to log in.
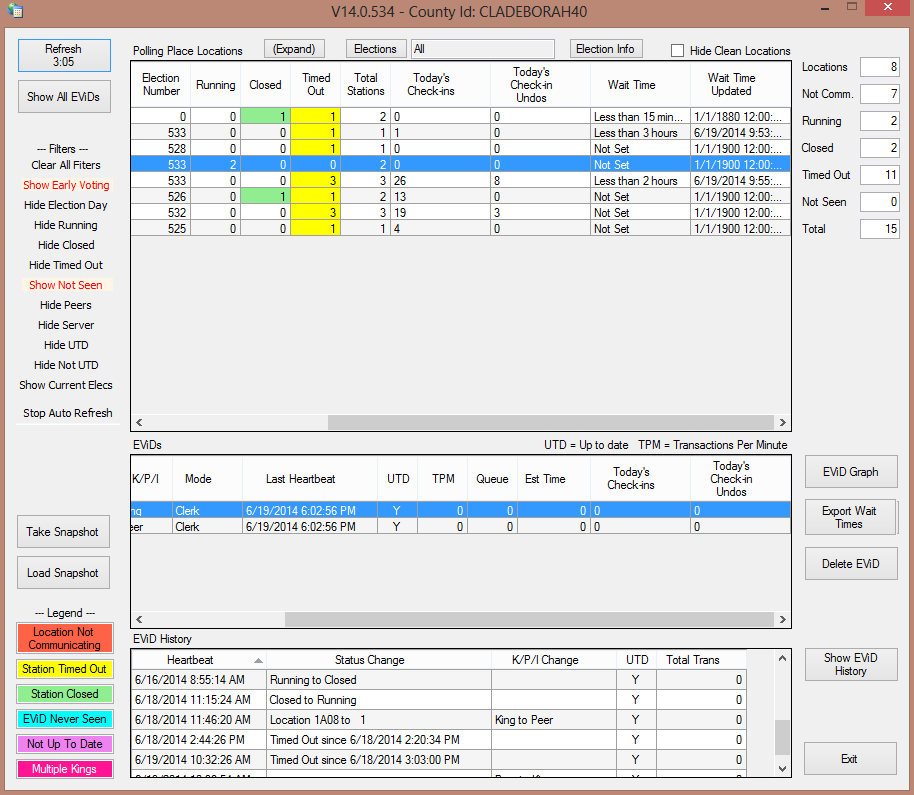
The following screenshot shows a view of Web Monitor with the right columns
of the Polling Place
Locations box. In the middle pane of the dialog, the screenshot
also shows the check-ins and undos for individual EViDs.
Web Monitor communicates frequently with the EViD Web Service to obtain the latest status of EViD stations in voting locations around the county. It also reports the status of the county server—that is, the computer running the county voter registration system. Each time Web Monitor communicates with the EViD Web Service, it refreshes its display. This automatic refresh can be turned off temporarily when you want to take a snapshot of Web Monitor. A refresh can be performed manually at any time.
See Illustration of EViD Communications for a graphic including Web Monitor communications.
Statistics that can be obtained from Web Monitor include:
Number of running EViD stations (that is, where Fast Voter Check-in is running)
Number of closed EViD stations* (where Fast Voter Check-in is not running)
Which EViD stations have timed out*
Which EViD stations are not being tracked or not communicating with the EViD website*
Total number of EViD stations*
EViD station names
The last time a specific EViD station communicated with Web Monitor
Current overall status of specific EViD stations
Total number of check-ins and undos today for each polling place and individual EViD stations.
Wait times and the time when the wait time was last updated.
* precinct and county wide
Web Monitor gets its list of voting locations through Web Messenger, but not automatically. Before each election, you need to send this information to Web Monitor by running Web Messenger, clicking Upload EViDs, and then clicking Upload Location & Election Info.
Note: You cannot upload this information earlier than 30 days before an election.
If you used EViD Maintenance to identify the EViD stations at each voting location, the EViD station data is sent to Web Monitor when you do an Upload EViDs operation. If you didn't use EViD Maintenance, opting instead to configure the EViDs manually at the voting locations, the Upload EViDs operation will insert a dummy EViD station for each voting location shown on Web Monitor. The dummy station will be replaced by real entries as each EViD station begins communicating.
The two Web Messenger operations—Upload EViDs and Upload Location & Election Info—should be done just after performing a database export. It need be done only one time per an election unless:
A change is made to your county's list of early voting sites or precinct polling places, there is an election override for a precinct that moves it to a temporary polling place for the election, or the place name of a voting location is changed. If any of these changes occur, run Web Messenger and click Upload Location & Election Info to update the names of voting locations on Web Monitor.
An EViD station is added, removed, or moved from one voting location to another and the move is recorded in EViD Maintenance. In any of these cases, run Web Messenger and click Upload EViDs. (If you have not specified settings in EViD Maintenance, you will see one dummy entry per location in Web Monitor.)
Web Monitor can also be run as a standalone program on a laptop or other computer in the field. All you need on the laptop is the Web Monitor executable and associated files, an internet connection, and a Web Monitor non-admin user name to log in.
The Web Monitor files can be found in the FTP section of the VR Systems User Community at:
...\EViD\WebMontior.zip
Unzip the files to any location on the laptop and then double-click EVIDWebMonitor.exe.
To start Web Monitor:
If you are working at a computer equipped with Voter Focus:
Start Voter Focus and go to EViD > Web Monitor.
Note: If you do not see the Web Monitor button, it is because you do not have the user permission EViDWebMonitor. See your Voter Focus administrator about adding this user permission to your user group.
If your computer does not have Voter Focus, navigate to the location on your computer where the executable file EViDWebMonitor_<version number>.exe is stored and double-click the file name.
If snapshot files are not currently associated with Web Monitor, you will see a message asking if you want to associate them now. See About Snapshots for more information.
On the login dialog, enter your county ID. This ID is your 3-character county code plus VR6. So for example, the county code for Leon County would be LEOVR6. Beneath the county ID, enter your user name. (User names are created and maintained on the User Maintenance dialog, which is accessed by logging into Web Monitor with an admin account. If you do not have a user name, see your system administrator or contact VR Systems.)
Select the database you want to use. Normal is the live production database. Sandbox is the database used for training purposes, and Staging is the database used when testing whether the staged EViDs are communicating with the EViD Web Service.
Note: For instructions on creating a Sandbox database, see the Voter Focus Help system.
Click OK. The Web Monitor dialog for the selected database appears.
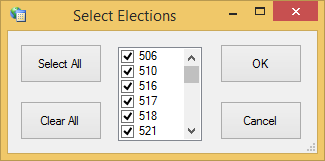
EViDs for all elections with EViD entries in Web Monitor are
listed in the top pane. To limit the list to the EViDs for a particular
election, click Elections (at the top of the dialog) and clear
the check box of the elections you don’t want.
(Expand)/(Normal) button at
the top of the dialog toggles between showing only the list of voting
locations and a divided view of voting locations and the EViD stations
at the highlighted location.
The Election Info button,
also at the top of the dialog, brings up a list of the elections current
loaded into Web Monitor via the Upload Location & Election Info
option in Web Messenger. On the elections list, you can use the date-range
fields to limit the list to elections occurring between selected dates.
Columns in the list can be sorted and repositioned like the columns
on the Web Monitor dialog. Note that data in the list is not
live until the EViD stations begin to come online. If you are reviewing
the list before the EViDs are online and something doesn't look right,
check that you selected Upload Location & Election Info in Web
Messenger.
The Hide Clean Locations option restricts the list to only those locations that are in need of attention. Locations where the EViDs are running fine are not shown.
Web Monitor remembers all settings, filter, and option selections from the previous session on your workstation.
If you don't have an internet connection, you can still view snapshot information on Web Monitor. Just remember that the data isn't live and won't be refreshed until there is an internet connection.
When you access Web Monitor in an offline environment, Web Monitor asks if you want to work offline. Choose Yes to continue. The Refresh button will be greyed out because there is no access to the EViD Web Service during offline operation.