Customizing Certificates
Upon successfully completing a course, students are awarded a certificate. You can use the default design provided by VR Systems, or you can upload a PNG or JPG file showing the design of your county's choice. You can also customize the student certificate appearance by including custom text and dynamic fields.
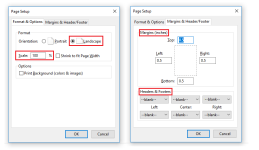
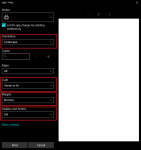
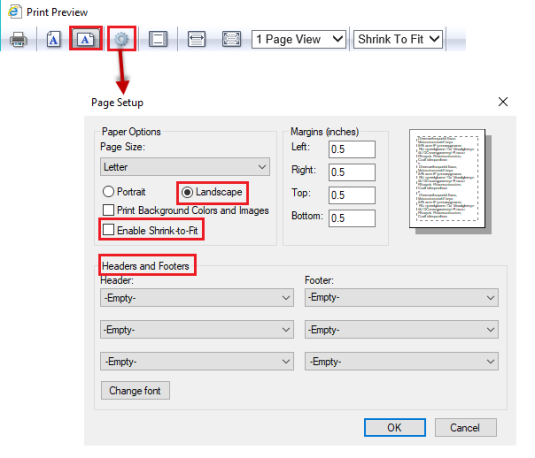
Prior to printing your completed certificate you'll want to make sure your settings are correct.
- In Print Preview, Page Setup, or in the Print dialog box, set your page layout to Landscape.

- Under more options, set the Scale field to 100% or Shrink to Fit.
- Set the Margins field to 0.5" or less.
- Optionally, remove headers and footers by disabling the checkbox for Headers and Footers or setting the field as --blank--.
To customize the certificate design:
- Navigate to Settings or Courses> Certificate tab.
- Upload an optional background image or use the default image provided.
- Select the size when printed.
- In the Designer, adjust the fields you would like to customize:
- Add a new field by selecting one from the drop-down box and clicking Add Field.
- Delete an existing field by selecting the field on the certificate and clicking Delete Field.
- Adjust the font by selecting the font name and size in the Font field. Additionally, you may select the color, style, and justify location.
- Once complete, click Save.
To customize the location of the fields on the certificate:
- Navigate to Settings or Courses> Certificate tab.
- On the Certificate preview, click on the field you'd like to move and hold.
- Drag the field to the new location.
- Click Save.
To use the default design provided by VR Systems:
- Navigate to Settings or Courses > Certificate tab.
- Click the Use Sys. Default button.
- Click OK on the message box to discard any custom certificates and use the default.
Certificate design will be set to the system default.


