Generate the Voter Certificate Export File
This task is performed after you have scheduled the voter certificates for a mass mailing, as described in Schedule Voter Certificates for a Mass Mailing.
-
Go to PRINTING > Notices Queue.
-
Select Show All Operator’s Notices.
-
In the Notice Type list, double-click Voter Certificate.
-
Select specific precincts by using the arrow keys to move them to the Precincts Selected list. To select all precincts for which certificates have been scheduled, leave the Precinct Selected list empty. Click OK.
-
On the Print Notice Run Parameters dialog, select Export to External Printing Service.
Select the Force dates to export as - 'yyyy/mm/dd' check box if you would like date fields (such as date of birth and registration date) to be exported in that format.
If the commercial printer requests that the export file be sorted, select an option in the Sort Option box. For mass mailings, the Zip Code option is typically selected.
Click OK.
-
On the Voter Management dialog, you are asked to enter the last registration date of certificates to be printed. We suggest you accept the default of today’s date unless you are printing certificates after book closing and don't want to send certificates to new voters who were registered after book closing. If this is the case, enter the book closing date. Voters who registered after the date you enter will not be included in the export file, which will affect the total number of records in the file.
Click OK.
-
The Select Notice Reasons dialog appears, displaying the text messages that can be printed on the certificates. These messages are defined in VOTER FOCUS ADMIN > System Options > VC Options. For this voter certificate run, the messages shown here can be customized with no effect on the system defaults. For example, if the certificates are going to voters whose normal polling place has changed, you might add a message drawing attention to this fact.
Remember, to print a text message on the certificate, the database field for the text message must be present on the document layout. For example, to print the message specified for Voter Certificate Message 1, the database field VCrdMsg1 must be on the document layout.
In the Select the Reasons you want printed box , you would typically select Printed through FlexRep for a mass mailing, but you can select other reasons if you want to send certificates to those voters as well. Click OK.
-
If you selected a zip code sort, Voter Focus displays a count of the certificates by zip code. To print the sorted certificate count to your default printer, click Print Image of this Dialog. It might be useful to give this report to the commercial printer, if they requested a zip code sort.
With a zip code sort, you have the option of generating the export file for the entire list or selecting one zip code and generating an export file containing just the records for that zip code. To select one zip code, highlight it and click OK. You will need to repeat the procedure described in this topic to export the certificates for the other zip codes; each run creates a new export file.
To include records for the entire list in the export file, make sure no individual zip codes are highlighted before you click OK.
-
The Windows Save As dialog appears, where you can indicate where to place the export file. The default location displayed is the folder specified in REPORTING > Flexible Reports > FlexRep Options > Path for Export Work Files, but you can change the location for this run to another folder, if you like.
The default file name is:
NoticesExportyyynnnn.txt
where yyyy is the current year and nnnn is the today’s date and time. If you like, change the default to a name that will better identify the file to the commercial printer, such as:
<your county name> Voter Certificates.txt
-
Click Save to create the export file. Depending on the size of your database, this will take some time. The status bar at the bottom of the Notices Queue dialog indicates the number of records processed. If you did not do a zip code sort, make a note of this number so you can give the commercial printer a count of the number of certificates in the export file.
-
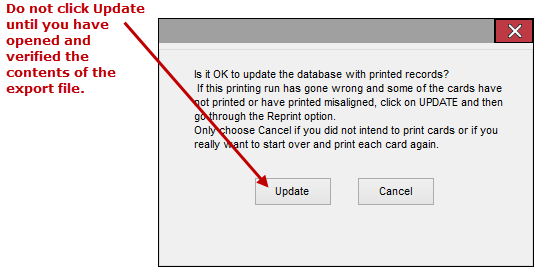
When the following dialog appears, DO NOT click Update. Check the export file first to be sure it is right.
-
Locate the export file and open it with Notepad, Excel, or Access. Examine the file carefully to be sure all records are sound.
If there is a problem, click Cancel on the dialog above. Then fix the problem and regenerate the export file by repeating this procedure from step 1. Depending on what the problem is, you might need to reschedule the certificates before you regenerate the export file. Contact VR Systems Customer Support if you need help with these tasks.
-
When you are certain that the file is good, return to the dialog shown in step 11 and click Update. It’s important that you do an update when you have a good export file that you intend to send out. The update process adds a communications entry to each affected voter’s record, indicating that they were sent a certificate. If you don’t do an update, you will have no record of those voters getting a certificate. The update operation also removes the voter information certificates in this run from the Notices Queue.


