Use the Email Run to Email Ballots to Voters
The Email run in Vote By Mail > Deliver Ballots can email ballots automatically along with a PDF of instructions to UOCAVA voters who have requested delivery of their ballot by email.
Like the envelope, label, and fax runs, the email run evaluates voters'
current registration status, party, and precinct to determine their current
eligibility and ballot style. This ensures that a voter who makes a mail ballot
request, and then moves to another precinct
Vote-By-Mail ballots delivered by email are numbered from a sequence over one million, to prevent the numbers from conflicting with those of paper ballots.
When you do an Email run, the outgoing emails are not sent immediately. They are collected in a queue, and then sent by a background Email Sender program, which is a scheduled task run by VRScheduler. Having a background task send the emails frees up the Deliver Ballots program for another run.
To have the Email run actually email ballots, the option VOTER FOCUS ADMIN > System Options > Vote By Mail > Email Ballots Delivered through Deliver Ballots must be selected. Otherwise the run only produces a report of voters who requested receipt of their ballot via email.
Before doing an Email run, we recommend you read Verify the Success of Outgoing Emails.
-
Ensure that the election you want is in focus.
-
Go to Vote By Mail > Deliver Ballots.
-
On the Deliver Ballots dialog, select Email in the Run Type box.
-
The Mailing Date field shows today's date This date will appear on the Vote-By-Mail tab of voter records, so that workers will be able to advise voters who want to know when their ballots were sent out. Click OK.
-
The Automatic Email of Ballot Setup dialog appears, showing the text that will appear in the email Subject line and Message body of all emails sent in this run. The default text shown in the Message box below is simply a placeholder for customized instructions from your county. This text SHOULD NOT BE USED as-is because voters must not return the ballot via email. See Set Up the Automatic Emailing of Ballots for instructions on customizing the default message text.
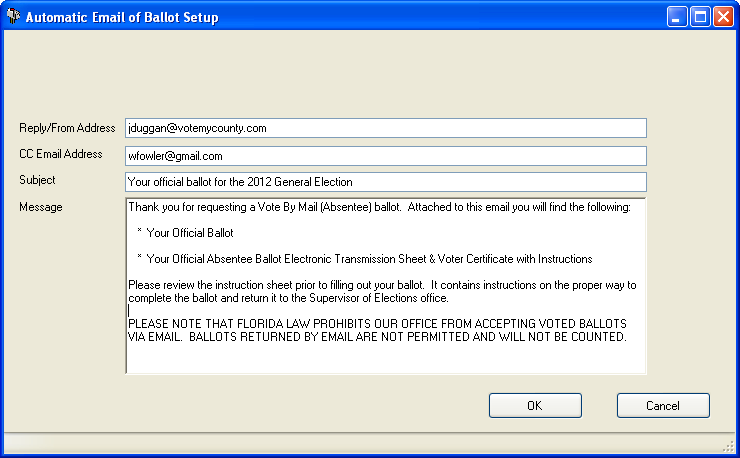
The email address(es) in the Reply/From Address field is taken from the Sender/Reply To Email Address field in VOTER FOCUS ADMIN > System Options > Email. This is the address that recipients will see in the From field of their email. You can change the address or add another one, separating the addresses with commas.
Enter one or multiple email addresses separated with a comma in the CC Email Address field and click OK. We recommend you enter an external address here (such as a Gmail address), so you can verify that emails can be sent outside your internal environment.
Click OK to proceed.
-
Select the ballot styles to be included in this print run and click OK.
-
Voter Focus generates an onscreen report of voters who have requested delivery by email. The report also lists any voters who requested email delivery, but who are now ineligible to vote in the election or are ineligible to receive delivery by email.
Review the report carefully to verify it lists the voters you intend to email ballots to. If there are any errors, fix them and start again with step 2. If you are satisfied that the list of voters is accurate, print the report as a record of the voters who received ballots in this run. You can dismiss the report after printing.
If you are not satisfied with the report, click Cancel to end the procedure.
If you are satisfied with the report, click Update to queue the emails for sending by the Email Sender program. The ballots and instructional PDFs will be attached to the emails when they go out. Clicking Update also makes the following changes to voter records:
- On the Vote-By-Mail tab, updates the Request Status field for the election to Delivered <today's date>. If you click Request Status on that tab, you will see a ballot delivery by email along with the email address and ballot style.
- Places an Abs-Mail entry on the Audit tab.
- Enters an outgoing email transaction on the Comms tab. You can double-click the Comms entry to open the Resend an Email dialog showing the current status of the email.
If you cancel now, the labels already processed must be printed. You can run the program again and those printed will not be printed again. Are you sure you want to Cancel this run?